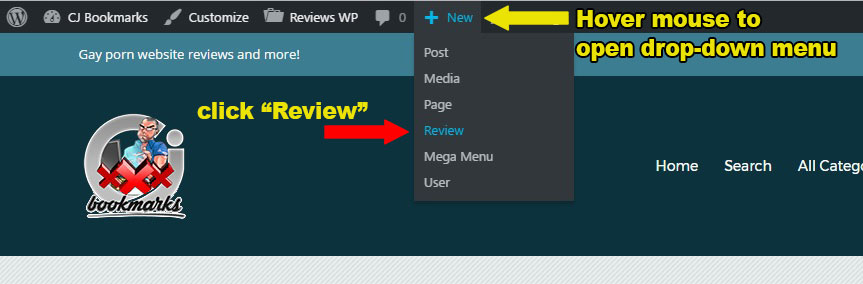
There are two ways to get to the Review Edit page to create a new review post.
First login to the site.
From the black admin bar at the top, hover your mouse over “+New”, then select “Review”
Or if you’re already in the admin dashboard, look on the left side black column and hover mouse over “Reviews”, then select “Add New”.

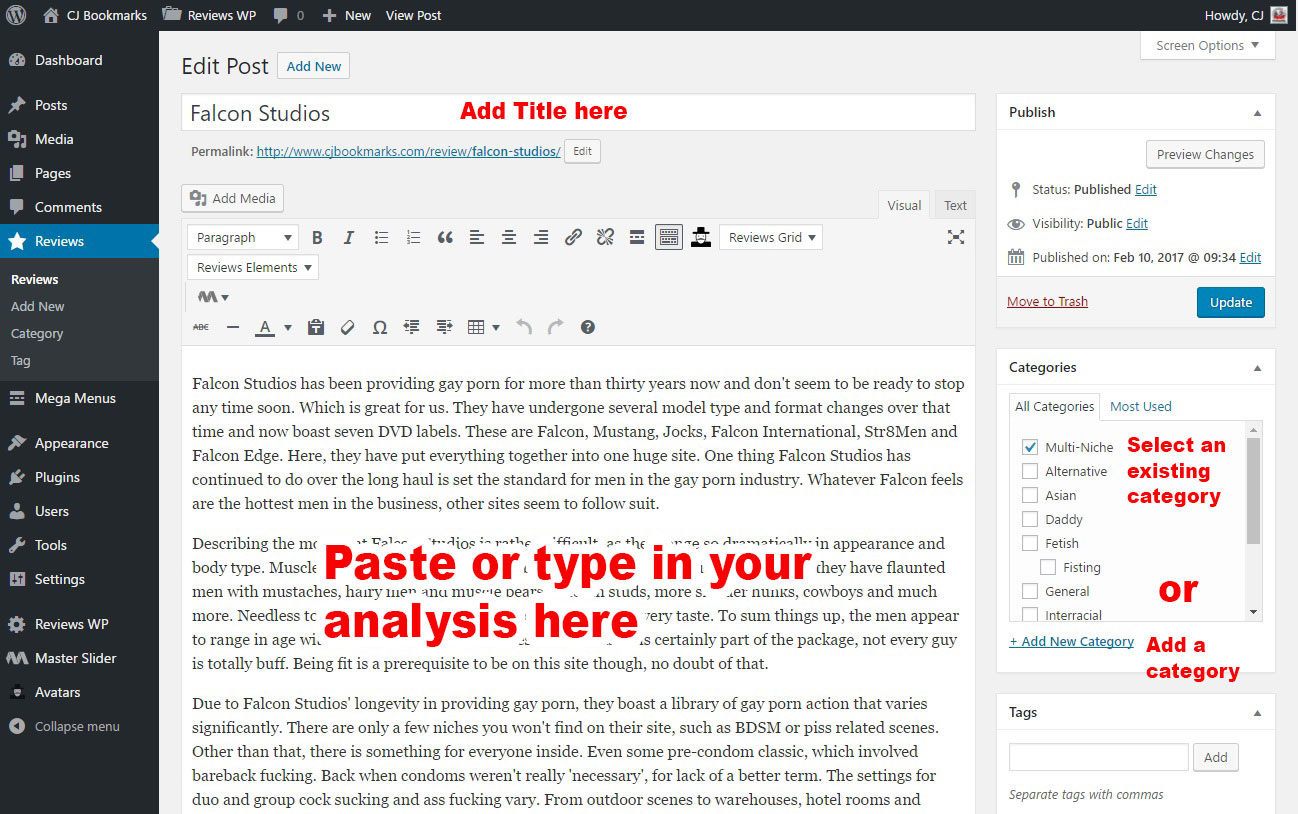
Now you are in the add new post page
Enter title, analysis text, category, tags…
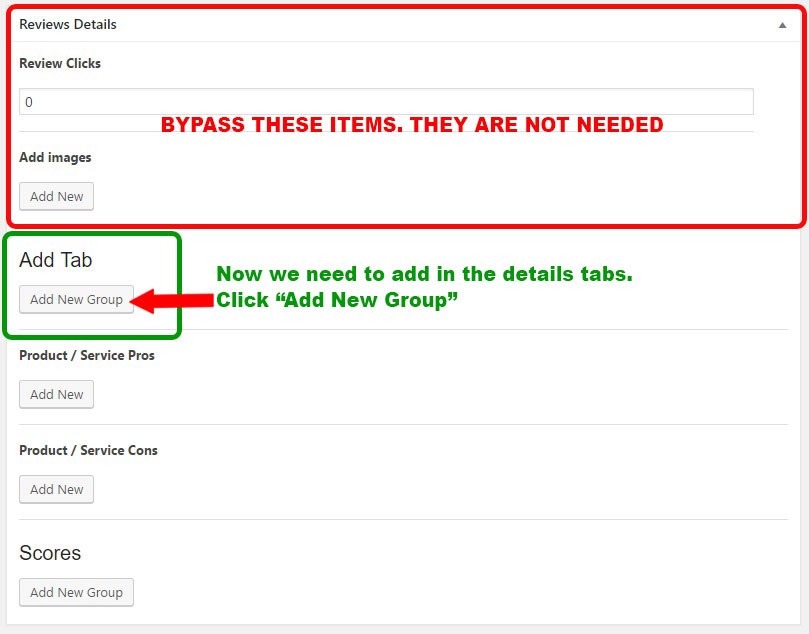
Now we need to add the tabs you see on the review page which contain the site’s details and stats.

To add these tabs, click on “Add New Group”
The New Group will open to this:

Once you click on “Gallery”, a pop up window will open. Click “Add Images”.
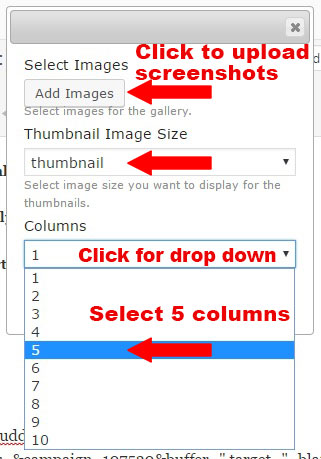
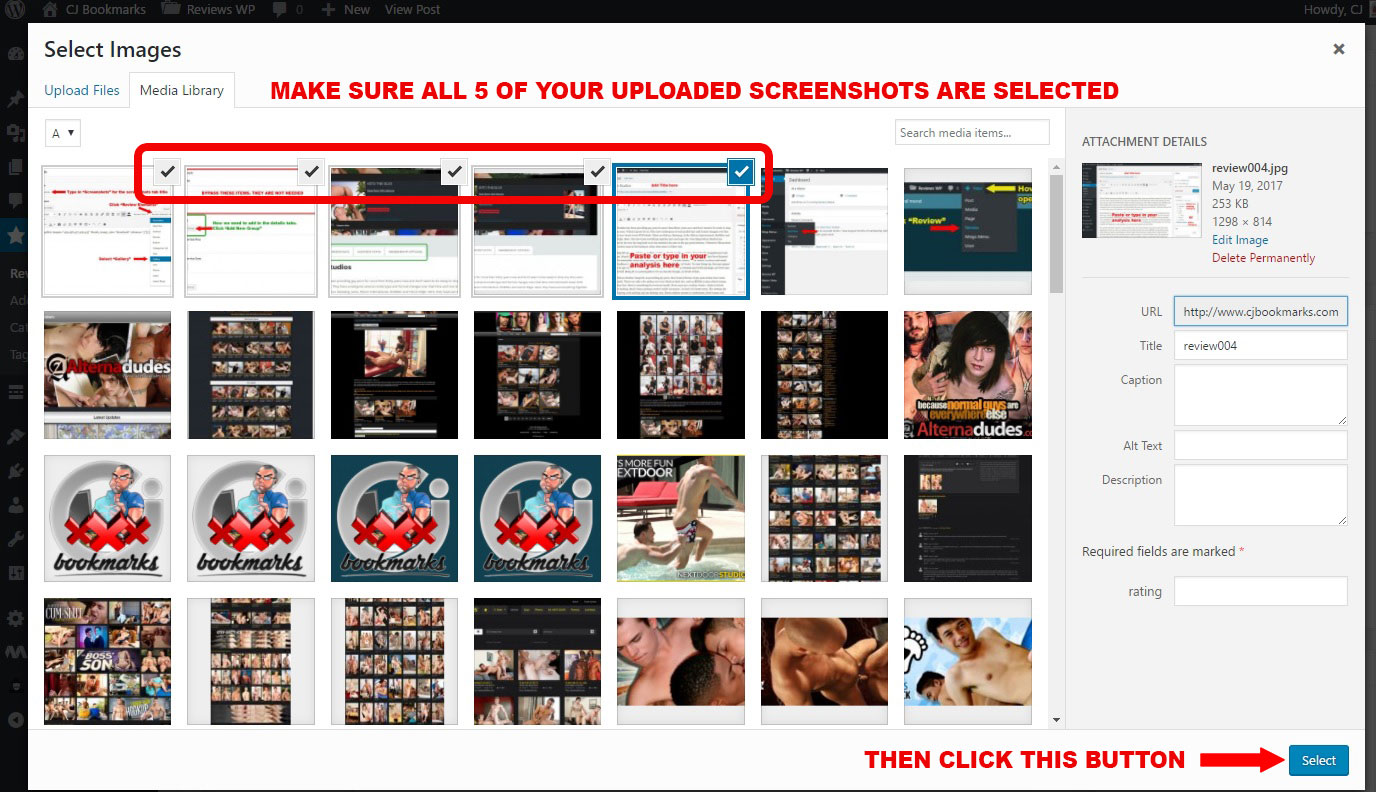
After you click the “Add Images” button the media library will open. Drag and drop 5 screenshots you took from the site you are reviewing into the media library. Once they are uploaded, they should all be automatically selected with a check mark.
Your add gallery will now show the 5 images. Make sure you select image size as “Thumbnail” and then select 5 columns.
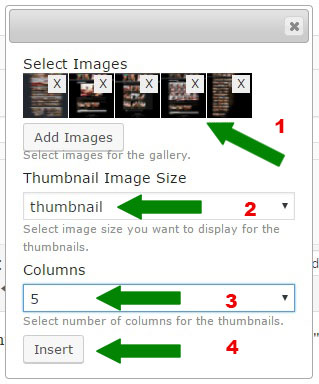
When you click the “Insert” button, it will input a shortcode for your gallery
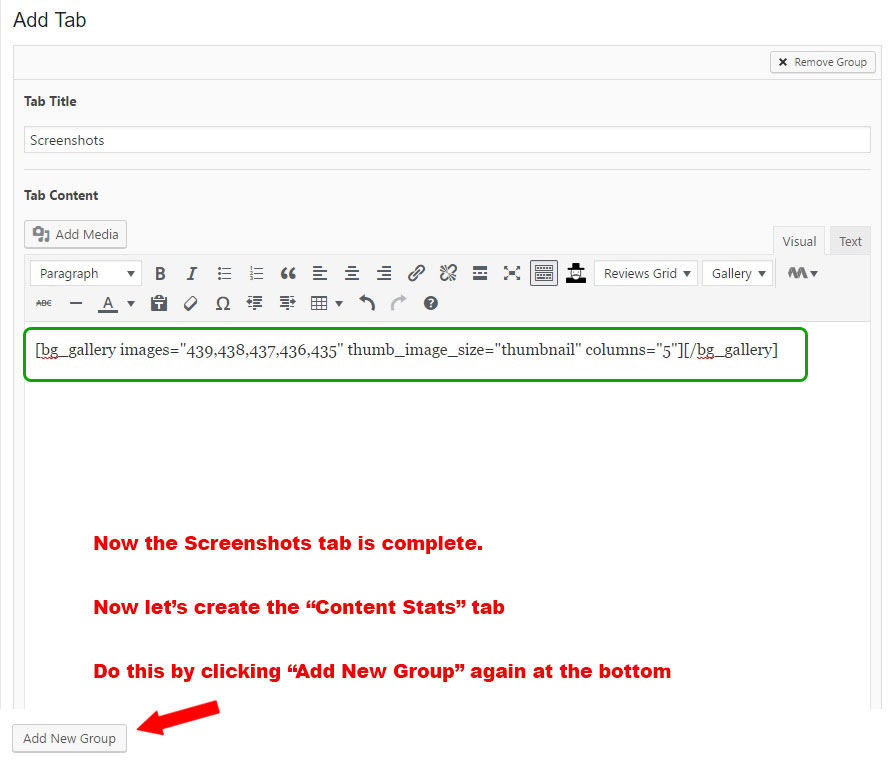
It opens a new Tab editor and we got through the same process (sort of) to create the “Content Stats” tab.
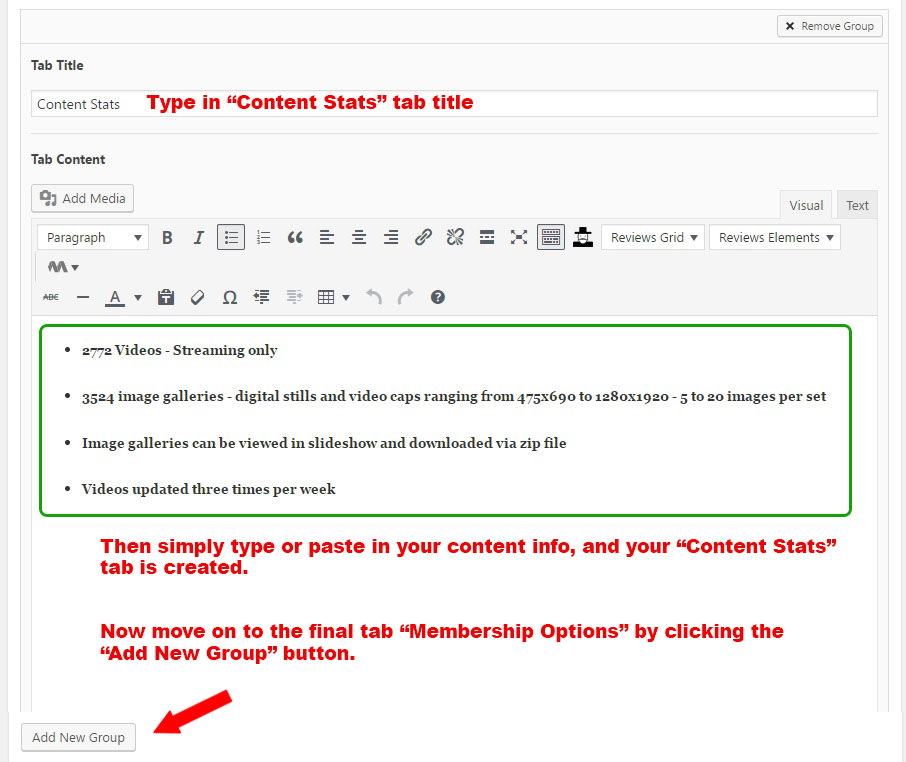
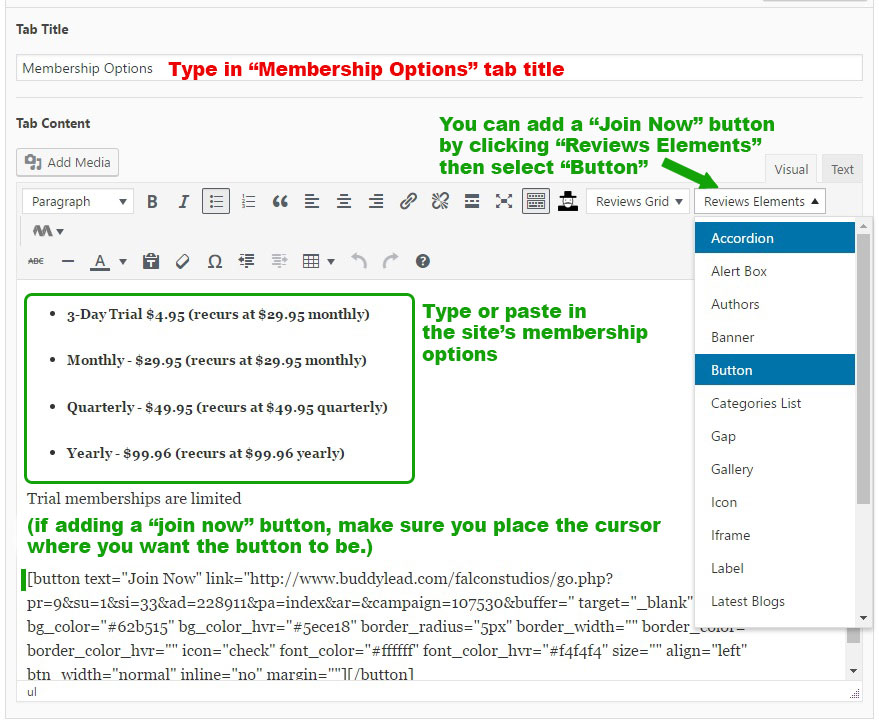
Now we create the “Membership Options” tab.
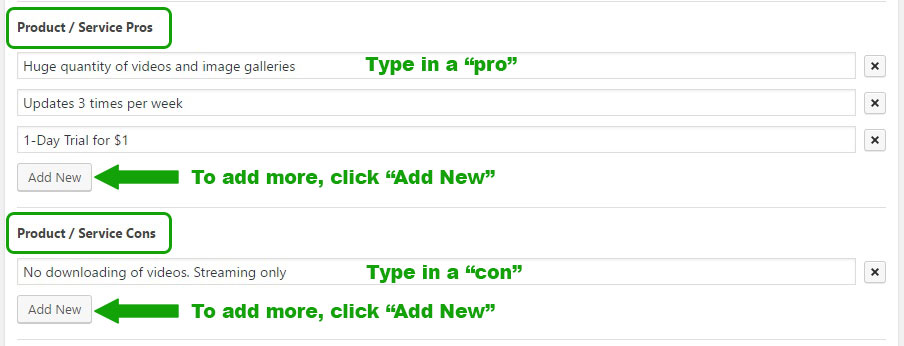
Now we need to enter the “Pros & Cons”
Now we need to add the ratings.

It will open a criteria scoring
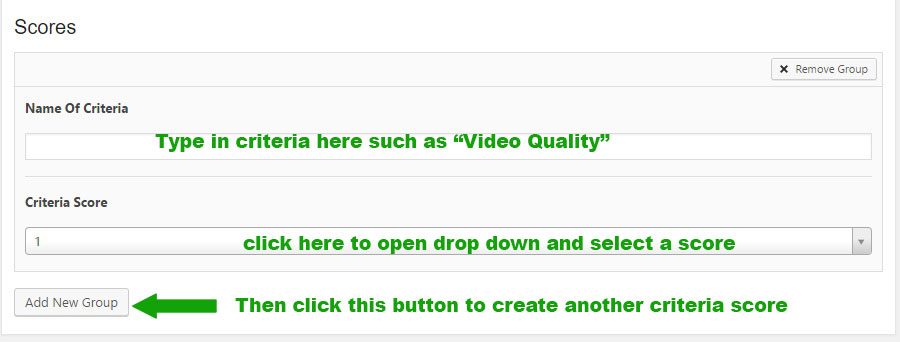
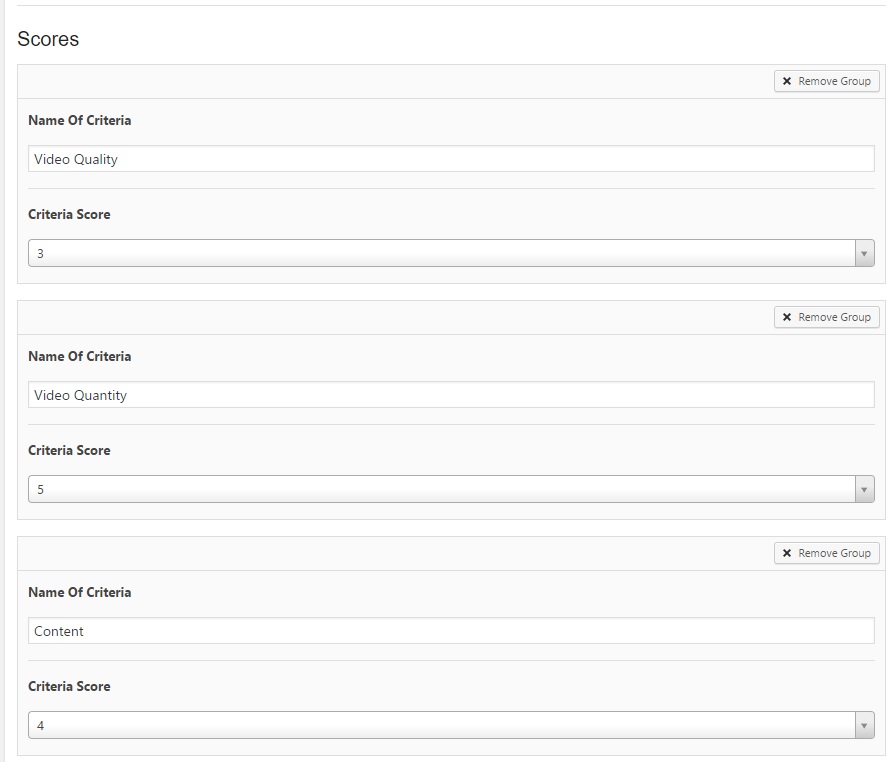
Do this for all the criteria you wish to rate. Here is an example of all the criteria I have been scoring:
Now we need to enter the affiliate link for the red “VISIT THIS WEBSITE” button on the right side top review summary.

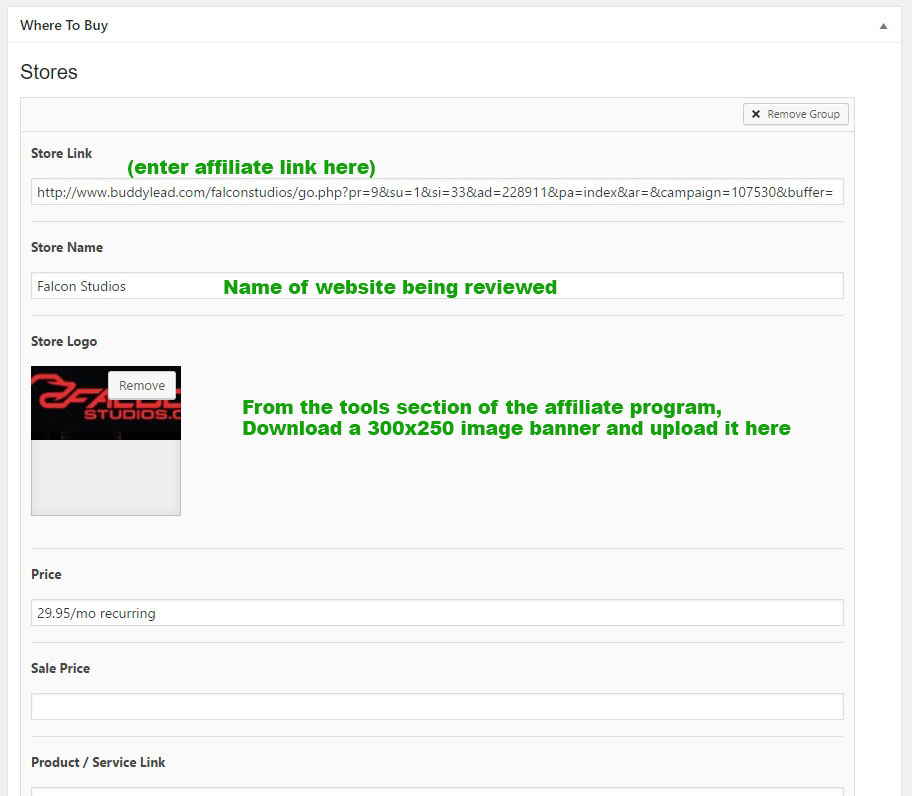
And finally, we need to enter the “Where To Buy” banner link which shows up on the right sidebar of the review page.
And this should complete the review!
Don’t forget to “Submit for Review” when you’re all finished! (located at the top right of the edit page)
